基於同態加密對加密資料進行情感分析
眾所周知,情感分析模型可以判斷一段文字是積極、消極還是中性的。然而,這個過程通常需要訪問未加密的文字,這可能會引發隱私問題。
同態加密是一種允許對加密資料進行計算而無需先解密的加密技術。這使得它非常適合於使用者個人和潛在敏感資料面臨風險的應用(例如,對私人訊息進行情感分析)。
這篇博文使用了 Concrete-ML 庫,它允許資料科學家在完全同態加密 (FHE) 環境中使用機器學習模型,而無需任何密碼學先驗知識。我們提供了一個實踐教程,介紹如何使用該庫構建一個對加密資料進行情感分析的模型。
本文涵蓋以下內容:
- Transformer 模型
- 如何結合使用 Transformer 和 XGBoost 進行情感分析
- 如何進行訓練
- 如何使用 Concrete-ML 將預測轉換為對加密資料的預測
- 如何使用客戶端/伺服器協議部署到雲端
最後但同樣重要的是,我們將以一個在 Hugging Face Spaces 上的完整演示來結束,以展示這一功能的實際應用。
環境設定
首先,請執行以下命令確保您的 pip 和 setuptools 是最新的:
pip install -U pip setuptools
現在,我們可以用以下命令安裝這篇博文所需的所有庫。
pip install concrete-ml transformers datasets
使用公共資料集
我們在這個 notebook 中使用的資料集可以在這裡找到。
為了表示用於情感分析的文字,我們選擇使用 Transformer 的隱藏表示,因為它能以一種非常高效的方式為最終模型帶來高準確率。若要將這種表示方法與更常見的 TF-IDF 方法進行比較,請參閱這個完整的 notebook。
我們可以先開啟資料集並可視化一些統計資料。
from datasets import load_datasets
train = load_dataset("osanseviero/twitter-airline-sentiment")["train"].to_pandas()
text_X = train['text']
y = train['airline_sentiment']
y = y.replace(['negative', 'neutral', 'positive'], [0, 1, 2])
pos_ratio = y.value_counts()[2] / y.value_counts().sum()
neg_ratio = y.value_counts()[0] / y.value_counts().sum()
neutral_ratio = y.value_counts()[1] / y.value_counts().sum()
print(f'Proportion of positive examples: {round(pos_ratio * 100, 2)}%')
print(f'Proportion of negative examples: {round(neg_ratio * 100, 2)}%')
print(f'Proportion of neutral examples: {round(neutral_ratio * 100, 2)}%')
然後,輸出結果如下:
Proportion of positive examples: 16.14%
Proportion of negative examples: 62.69%
Proportion of neutral examples: 21.17%
積極和中性樣本的比例相當接近,但消極樣本的數量要多得多。讓我們記住這一點,以便選擇最終的評估指標。
現在我們可以將資料集分割成訓練集和測試集。我們將為這段程式碼使用一個種子,以確保其完全可復現。
from sklearn.model_selection import train_test_split
text_X_train, text_X_test, y_train, y_test = train_test_split(text_X, y,
    test_size=0.1, random_state=42)
使用 Transformer 進行文字表示
Transformer 是一種神經網路,通常被訓練來預測文字中接下來會出現的詞(這個任務通常被稱為自監督學習)。它們也可以在一些特定的子任務上進行微調,從而使其在特定問題上表現更佳。
它們是處理各種自然語言處理任務的強大工具。實際上,我們可以利用它們對任何文字的表示,並將其輸入到一個對 FHE 更友好的機器學習模型中進行分類。在這個 notebook 中,我們將使用 XGBoost。
我們首先匯入 Transformer 所需的庫。在這裡,我們使用來自 Hugging Face 的流行庫來快速獲取一個 Transformer 模型。
我們選擇的模型是一個 BERT Transformer,它在斯坦福情感樹庫資料集上進行了微調。
import torch
from transformers import AutoModelForSequenceClassification, AutoTokenizer
device = "cuda:0" if torch.cuda.is_available() else "cpu"
# Load the tokenizer (converts text to tokens)
tokenizer = AutoTokenizer.from_pretrained("cardiffnlp/twitter-roberta-base-sentiment-latest")

# Load the pre-trained model
transformer_model = AutoModelForSequenceClassification.from_pretrained(
   "cardiffnlp/twitter-roberta-base-sentiment-latest"
)
這應該會下載模型,現在模型已準備就緒。
對於某些文字,使用其隱藏表示一開始可能會有些棘手,主要是因為我們可以用多種不同的方法來處理。以下是我們選擇的方法。
首先,我們對文字進行分詞 (tokenize)。分詞意味著將文字分割成詞元 (token,可以是一個詞或特定字元序列),並用一個數字替換每個詞元。然後,我們將分詞後的文字傳送給 Transformer 模型,該模型會為每個詞輸出一個隱藏表示(自注意力層的輸出,通常用作分類層的輸入)。最後,我們對每個詞的表示進行平均,以獲得文字級別的表示。
結果是一個形狀為 (樣本數量, 隱藏層大小) 的矩陣。隱藏層大小是隱藏表示中的維度數量。對於 BERT,隱藏層大小是 768。隱藏表示是代表文字的數字向量,可用於許多不同的任務。在這種情況下,我們將用它來進行 XGBoost 分類。
import numpy as np
import tqdm
# Function that transforms a list of texts to their representation
# learned by the transformer.
def text_to_tensor(
   list_text_X_train: list,
   transformer_model: AutoModelForSequenceClassification,
   tokenizer: AutoTokenizer,
   device: str,
) -> np.ndarray:
   # Tokenize each text in the list one by one
   tokenized_text_X_train_split = []
   tokenized_text_X_train_split = [
       tokenizer.encode(text_x_train, return_tensors="pt")
       for text_x_train in list_text_X_train
   ]

   # Send the model to the device
   transformer_model = transformer_model.to(device)
   output_hidden_states_list = [None] * len(tokenized_text_X_train_split)

   for i, tokenized_x in enumerate(tqdm.tqdm(tokenized_text_X_train_split)):
       # Pass the tokens through the transformer model and get the hidden states
       # Only keep the last hidden layer state for now
       output_hidden_states = transformer_model(tokenized_x.to(device), output_hidden_states=True)[
           1
       ][-1]
       # Average over the tokens axis to get a representation at the text level.
       output_hidden_states = output_hidden_states.mean(dim=1)
       output_hidden_states = output_hidden_states.detach().cpu().numpy()
       output_hidden_states_list[i] = output_hidden_states

   return np.concatenate(output_hidden_states_list, axis=0)
# Let's vectorize the text using the transformer
list_text_X_train = text_X_train.tolist()
list_text_X_test = text_X_test.tolist()

X_train_transformer = text_to_tensor(list_text_X_train, transformer_model, tokenizer, device)
X_test_transformer = text_to_tensor(list_text_X_test, transformer_model, tokenizer, device)
這種文字轉換(從文字到 Transformer 表示)需要在客戶端機器上執行,因為加密是在 Transformer 表示上進行的。
使用 XGBoost 進行分類
既然我們已經為訓練分類器正確地構建了訓練集和測試集,接下來就是訓練我們的 FHE 模型。這裡過程會非常直接,使用像 scikit-learn 的 GridSearch 這樣的超引數調優工具。
from concrete.ml.sklearn import XGBClassifier
from sklearn.model_selection import GridSearchCV
# Let's build our model
model = XGBClassifier()

# A gridsearch to find the best parameters
parameters = {
    "n_bits": [2, 3],
    "max_depth": [1],
    "n_estimators": [10, 30, 50],
    "n_jobs": [-1],
}

# Now we have a representation for each tweet, we can train a model on these.
grid_search = GridSearchCV(model, parameters, cv=5, n_jobs=1, scoring="accuracy")
grid_search.fit(X_train_transformer, y_train)

# Check the accuracy of the best model
print(f"Best score: {grid_search.best_score_}")

# Check best hyperparameters
print(f"Best parameters: {grid_search.best_params_}")

# Extract best model
best_model = grid_search.best_estimator_
輸出如下:
Best score: 0.8378111718275654
Best parameters: {'max_depth': 1, 'n_bits': 3, 'n_estimators': 50, 'n_jobs': -1}
現在,讓我們看看模型在測試集上的表現如何。
from sklearn.metrics import ConfusionMatrixDisplay
# Compute the metrics on the test set
y_pred = best_model.predict(X_test_transformer)
y_proba = best_model.predict_proba(X_test_transformer)

# Compute and plot the confusion matrix
matrix = confusion_matrix(y_test, y_pred)
ConfusionMatrixDisplay(matrix).plot()

# Compute the accuracy
accuracy_transformer_xgboost = np.mean(y_pred == y_test)
print(f"Accuracy: {accuracy_transformer_xgboost:.4f}")
輸出如下:
Accuracy: 0.8504
對加密資料進行預測
現在讓我們對加密文字進行預測。這裡的想法是,我們將加密由 Transformer 提供的表示,而不是原始文字本身。在 Concrete-ML 中,你可以透過在 predict 函式中設定引數 execute_in_fhe=True 來快速實現這一點。這只是一個開發者功能(主要用於檢查 FHE 模型的執行時間)。稍後我們將看到如何在部署環境中實現這一點。
import time
# Compile the model to get the FHE inference engine
# (this may take a few minutes depending on the selected model)
start = time.perf_counter()
best_model.compile(X_train_transformer)
end = time.perf_counter()
print(f"Compilation time: {end - start:.4f} seconds")

# Let's write a custom example and predict in FHE
tested_tweet = ["AirFrance is awesome, almost as much as Zama!"]
X_tested_tweet = text_to_tensor(tested_tweet, transformer_model, tokenizer, device)
clear_proba = best_model.predict_proba(X_tested_tweet)

# Now let's predict with FHE over a single tweet and print the time it takes
start = time.perf_counter()
decrypted_proba = best_model.predict_proba(X_tested_tweet, execute_in_fhe=True)
end = time.perf_counter()
fhe_exec_time = end - start
print(f"FHE inference time: {fhe_exec_time:.4f} seconds")
輸出變為:
Compilation time: 9.3354 seconds
FHE inference time: 4.4085 seconds
檢查 FHE 預測是否與明文預測相同也是必要的。
print(f"Probabilities from the FHE inference: {decrypted_proba}")
print(f"Probabilities from the clear model: {clear_proba}")
此輸出顯示為:
Probabilities from the FHE inference: [[0.08434131 0.05571389 0.8599448 ]]
Probabilities from the clear model: [[0.08434131 0.05571389 0.8599448 ]]
部署
至此,我們的模型已經完全訓練和編譯好,可以進行部署了。在 Concrete-ML 中,你可以使用 部署 API 來輕鬆完成此操作。
# Let's save the model to be pushed to a server later
from concrete.ml.deployment import FHEModelDev
fhe_api = FHEModelDev("sentiment_fhe_model", best_model)
fhe_api.save()
這幾行程式碼足以匯出客戶端和伺服器所需的所有檔案。你可以在這裡檢視詳細解釋這個部署 API 的 notebook。
在 Hugging Face Space 中的完整示例
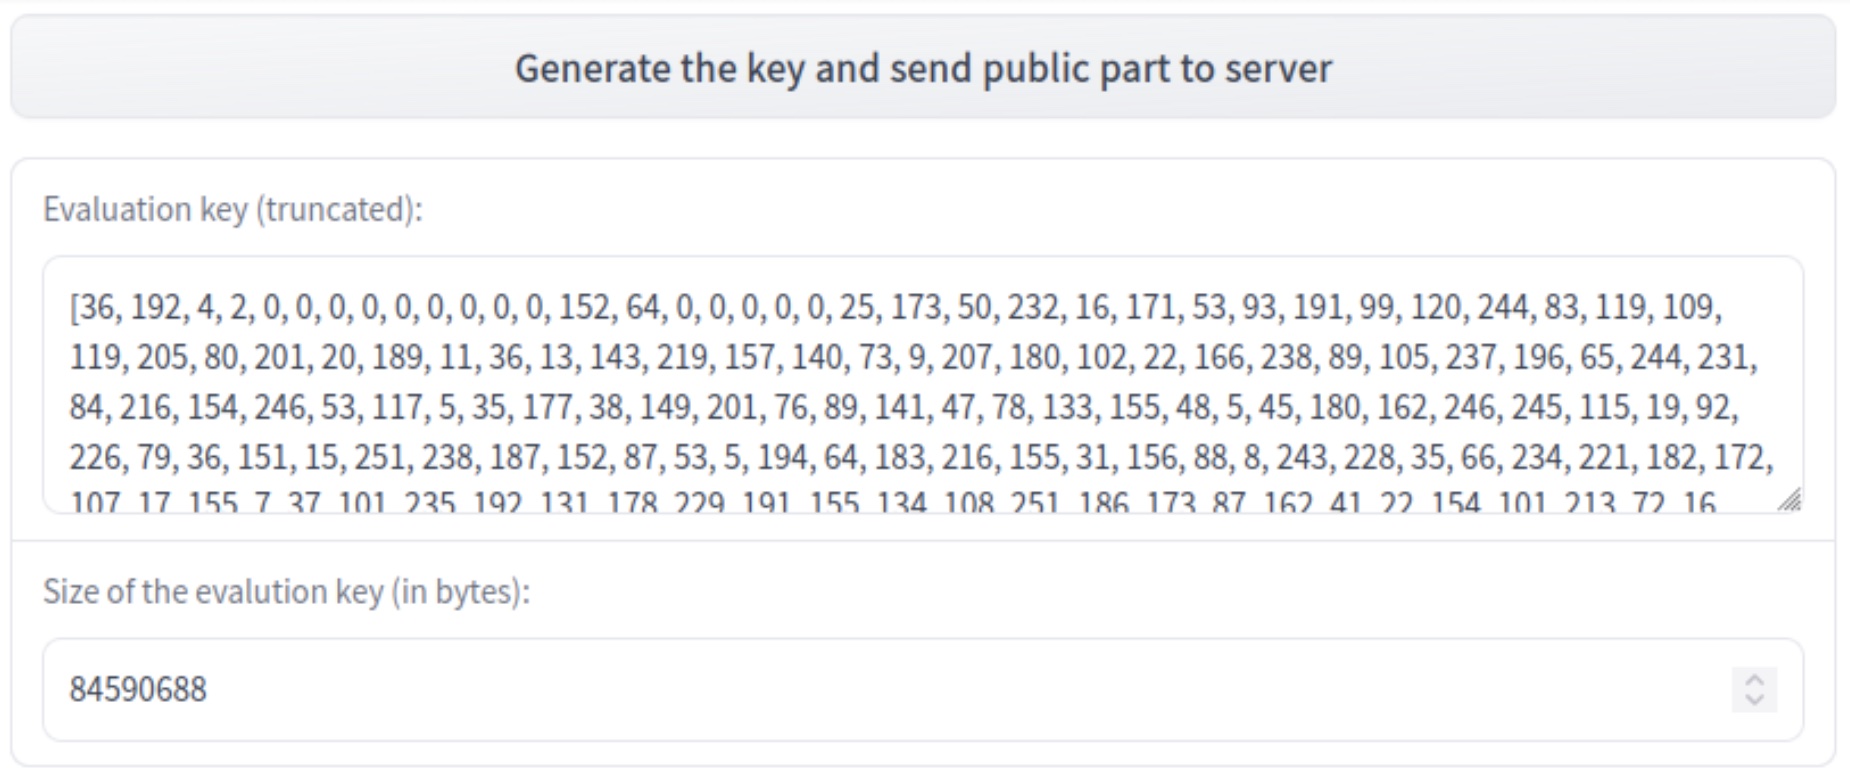
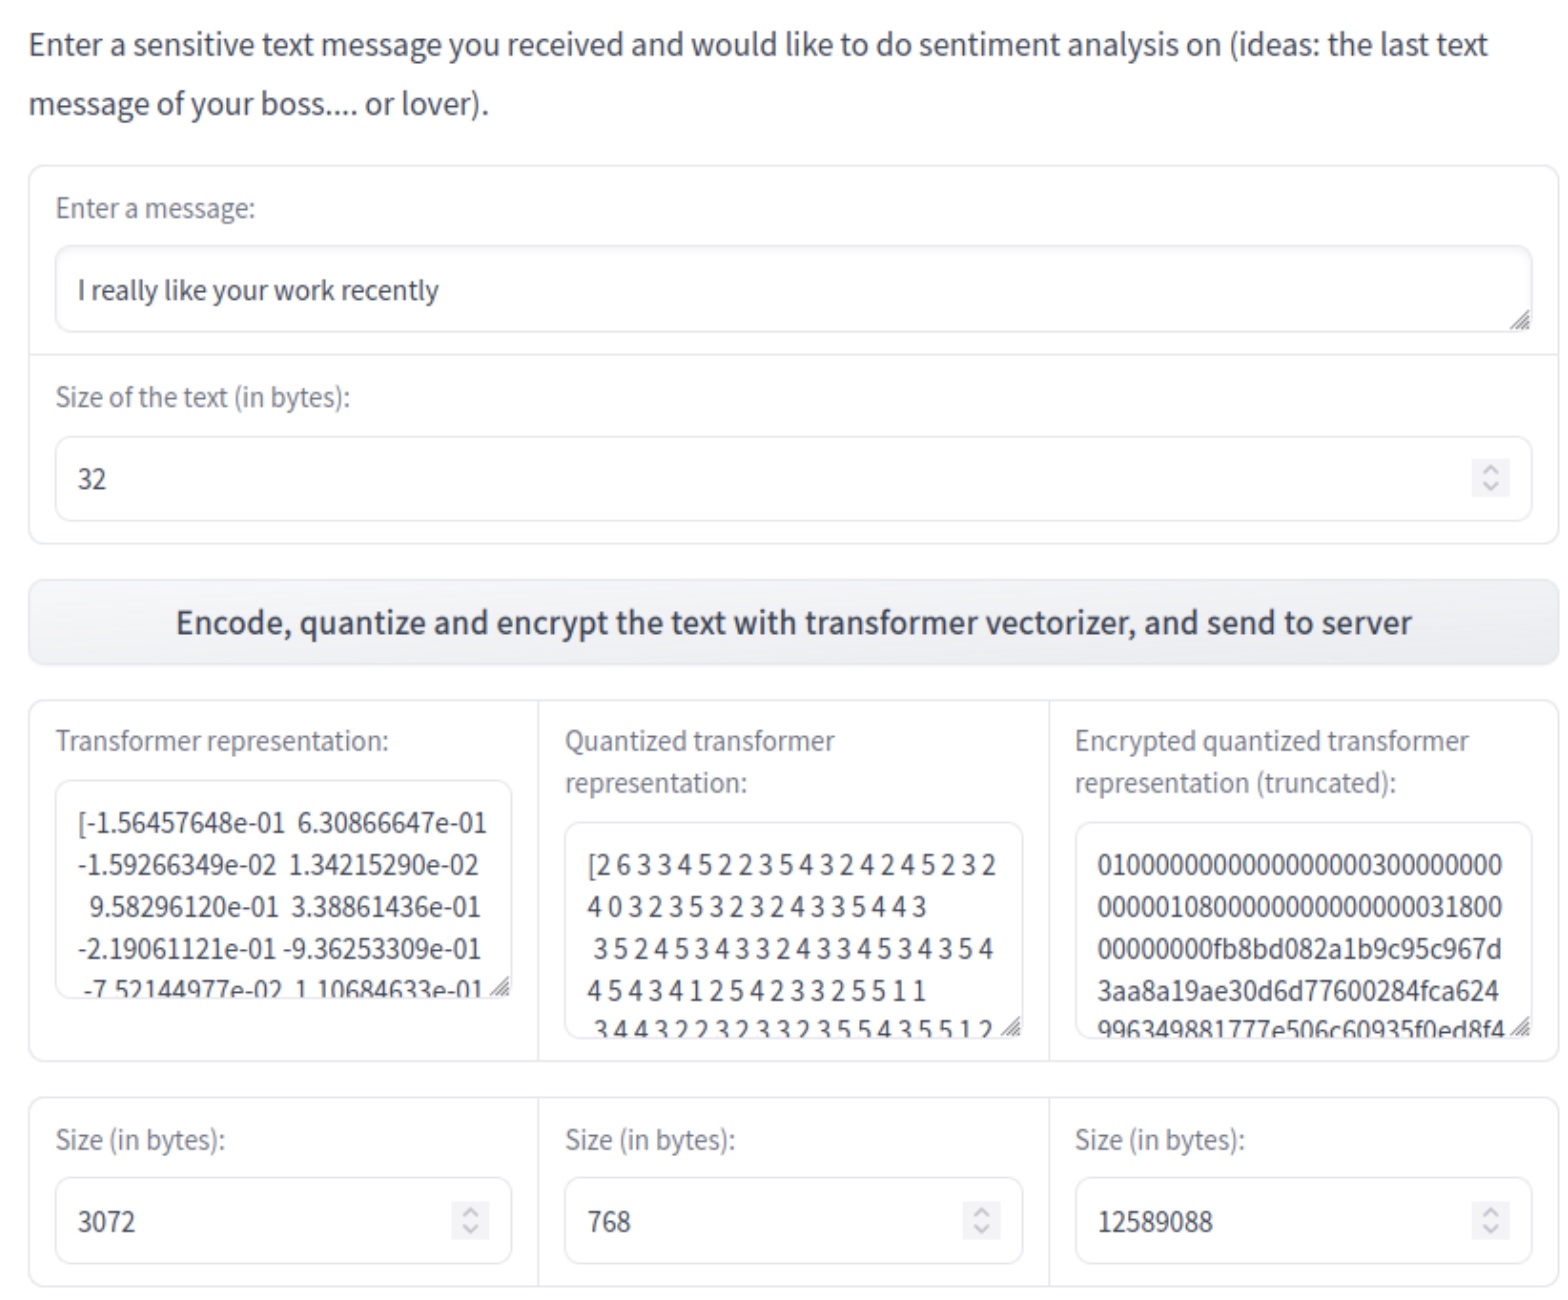
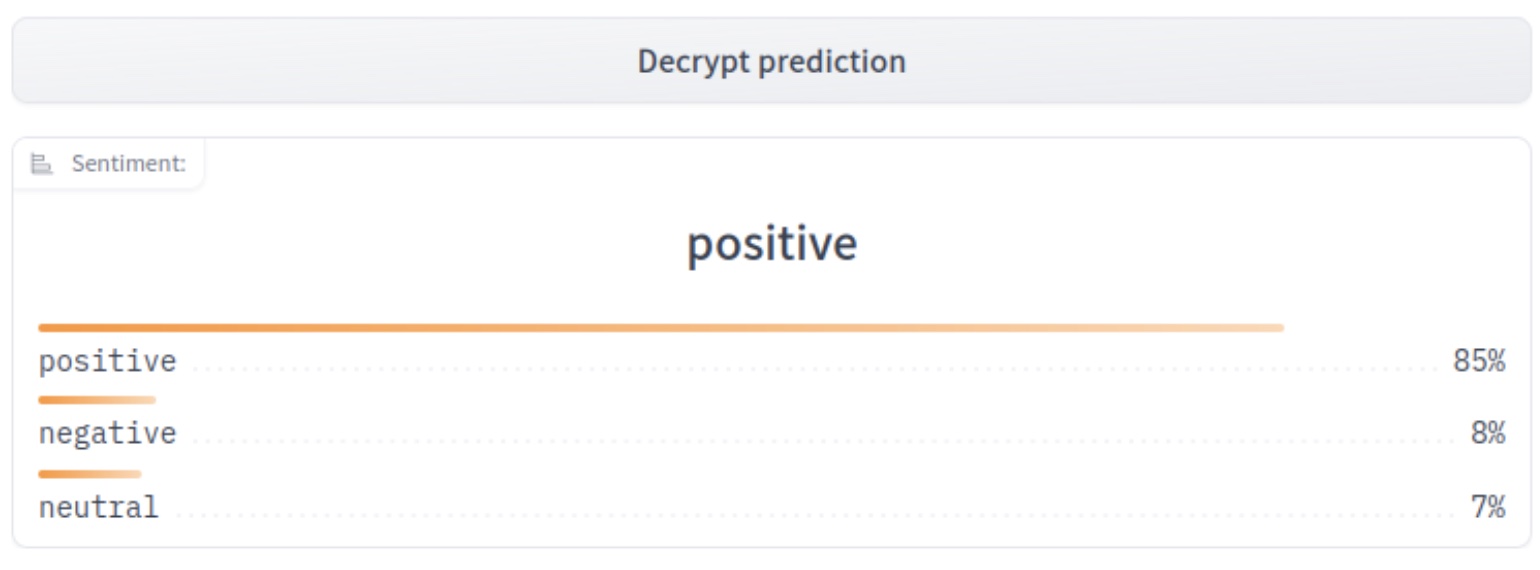
你也可以檢視在 Hugging Face Space 上的最終應用程式。客戶端應用是使用 Gradio 開發的,而伺服器則執行在 Uvicorn 上,並使用 FastAPI 進行開發。
過程如下:
- 使用者生成新的私鑰/公鑰
- 使用者輸入一條訊息,該訊息將被編碼、量化和加密
- 伺服器接收加密資料,並使用公共評估金鑰開始對加密資料進行預測
- 伺服器發回加密的預測結果,客戶端可以使用其私鑰進行解密
結論
我們提出了一種利用 Transformer 強大的表示能力的方法,該表示隨後用於:
- 訓練一個機器學習模型來分類推文,以及
- 使用該模型透過 FHE 對加密資料進行預測。
最終模型(Transformer 表示 + XGboost)的最終準確率為 85%,高於 Transformer 本身的 80% 準確率(請參閱此 notebook進行比較)。
在 16 核 CPU 上,每個樣本的 FHE 執行時間為 4.4 秒。
用於部署的檔案被用於一個情感分析應用程式,該程式允許客戶端向伺服器請求情感分析預測,同時在整個通訊鏈中保持其資料加密。
Concrete-ML(別忘了在 Github 上給我們點星 ⭐️💛)可以輕鬆地構建機器學習模型並將其轉換為 FHE 等效模型,以便能夠對加密資料進行預測。
希望您喜歡這篇文章,並歡迎告知我們您的想法/反饋!
特別感謝 Abubakar Abid 此前為我們構建第一個 Hugging Face Space 提供的建議!


